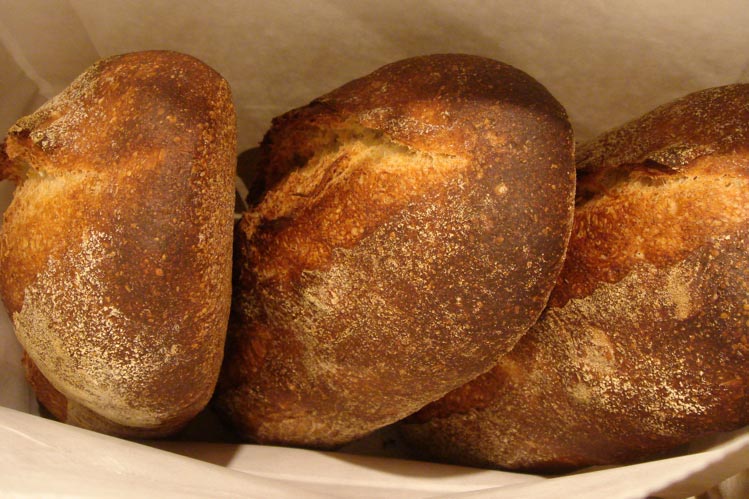
For some reason, being busy and stressed always makes me want to make things. I guess the
feeling of productivity eases the panic of
having-still-so-much-to-do-and-not-knowing-whether-it-is-even-possible-much-less-when-the-next-opportunity-for-sleep-might-come, even if the thing produced in no way advances the goal that gave rise to the
stress in the first place. In that frame of mind I have in the past few weeks
made chocolate granola, cinnamon muesli and yoghurt, started up a sourdough
culture and baked a few gigantic loaves of bread.
I was pleasantly surprised, actually, by the yoghurt making, which turned
out to be dead easy and super satisfying. But the real revelation was the
bread.
Let me back up here. I live in England. The English are obsessed. with.
soft. bread. Sticky, flavourless bread. Palate-suffocating bread. Bread that
can only be tolerated after toasting – and even then, barely. Bread that is
mouldy before it even begins to go stale. Aisles upon aisles of extra soft
white bread. But no decent loaf in sight. Ironically, what triggered my
attempts to bake bread was finally finding a loaf that I did love: a sourdough
rye bread from my veg box suppliers Abel & Cole. It wasn’t even that
switching to it would have been unaffordable, but somehow this bread got me
thinking. Perhaps I was just curious how sourdough gets made, and what the
difference with a regular bread is, and then found out from the internets that
starting a culture without all kinds of fancy measuring devices isn’t actually
that impossible. Perhaps it came up in one of those BBC cookery programmes that
are so nice to watch during dinner. I honestly don’t remember. But somehow I
decided I wanted to give it a go.
Now there are really two elements to baking sourdough bread. Raising the
culture, and baking the bread. Fun fact: you’ll have a new family member to
take care of for several weeks before you even get to the latter stage at all.
Yup, that’s a warning: raising a sourdough starter requires some serious patience
and commitment. You will also have to get over the pain of throwing away
substantial quantities of flour in the first month, unless you want to commit
to feeding your household / office / workplace pancakes for breakfast every day
for three weeks.
It’s all worth it.
There are a few different ways to start a sourdough starter, and if
you’re interested in some live-action controversy you only have to google “wild
yeast starter” and indulge in the results. Basically, a starter is just flour
plus water plus lots of time, but depending on whom you speak to the best
results are clearly obtained by kick-starting the culture by adding grapes or
cabbage, or by substituting the water with boiled pineapple juice. The world of
sourdough bakers is also divided into feeders and fridgers and freezers and
many more exciting categories. Becoming a bread nerd is easy. Anyway, despite the oceans of information, so is establishing
a culture. Just pick somewhere to start and commit to looking up any problems
you encounter or questions you have.
So without further ado… here’s Naomi’s Rules for Starting a Sourdough
Starter:
- First, go look at these pictures here
and here.
That’s the goal. Four weeks. Drooling yet?
- You need kitchen scales. Even if they’re just
the £4 ones from Tesco. You’ll thank yourself. And this is coming from someone
who has been baking cakes and pies for years and years without any measuring
device beyond a warped plastic jug. Honestly, just do it.
- Buy a large bag of wholegrain rye flour and a
large bag of unbleached white flour (must
be organic). Try to get fresh batches. (While you’re at it, get some
wholemeal flour too – you’ll need it once you are ready to actually bake a
bread.) Keep your flour in the fridge in a plastic bag (at room temp the oils
will go rancid pretty quickly, gross).
- Find a container that has transparent and
more-or-less straight sides and a lid (an empty yoghurt cup works well). It
needs to have space for the starter to triple.
- Now for the action. The basic drill is this:
every 12 hours, discard two-thirds of the culture, then “feed” 1 part culture
with 1 part flour and 1 part water. Easy, huh? Ok, you need to have culture
first before you can discard any. So the first day: mix 100g lukewarm water +
50g white flour + 50g rye flour, put in container, mark top of mixture with
some tape (yes on the outside of the box) so progression can be checked. (I
pretty much follow the instructions given here;
they’re along the lines of how I ended up raising my starter, plus it’s the place
where I got the recipe for the first bread that blew my socks off. The
instructions are probably clearer there anyway. Fewer tangents, too.) It’s
important that the flour is organic, because you want it to have yeasts on it
that will mature and multiply and eventually raise your bread. (I always
thought sourdough bread did not have any yeast, but it turns out I was WRONG!)
Leave the mixture in a warm place (boiler cupboard) for 24 hours. After 24
hours…
- …measure out 50g or 75g of culture and discard
the rest (don’t be tempted to use it in the first few days – bacteria etc.).
“Feed” the culture with equal amounts of water and flour. So take 50g starter,
mix with 50g water, then mix in 50g flour (25g rye and 25g white). (Or 75g +
75g + 75g… you get the point.) Put back in its warm place.
- You will now need to repeat step 6 twice a day
for a month. That’s right. Four weeks of feedings, every twelve hours. Time
carefully.
(The good news is, you can start baking a
lot sooner than that. Ten days or so and you should be ready to go. The other
twenty days are just to get the starter stronger, but they do make a
difference!)
- Resist the temptation to judge your culture too
soon. In the first few days, it might first rise a lot and then very little, or
it may not smell very great. Just keep up with it for a few feedings and see
where things land. If the mixture separates, develops a layer of liquid on top
and smells of alcohol, it probably means you forgot to feed it. Just feed
normally as soon as you can and don’t neglect it again.
- After a few days, the culture should gradually
start rising a bit more in between feedings. In a panic? See point 14.
- Starter bubbly? Smells nice? Rises significantly
between feedings, close to doubling in 12 hours? This should happen after five
days or so. When it does, you’re ready to make some pancakes! Down to the
recipe, go go go! (From this point onwards you can also switch to feeding with
water and white flour only, though I still always use half rye.)
- After 7–10 days of twice-daily feedings, the
starter should be doubling (or almost doubling) in 8 hours. Congratulations! At
this point, you can start baking bread with it. Make very sure, though, that
you don’t accidentally use the entire starter for a bread!
- After a month, the starter should be strong. If
you wish, you can now put it in the fridge, taking it out to bake with and to feed
every week or two weeks. Refrigerated starter may need one extra
discard–feed–discard-cycle and some time in the warmth before it’s ready to be
used for a bread. The starter will still rise and produce gas, so don’t put in
too small a container, and put on any screw-top lids loosely.
- I’d also put a back-up in the fridge: instead of
discarding two-thirds of the starter when feeding, keep an extra 50g, feed
normally, put in the fridge, and feed or replace every one or two months. (I
usually just replace it every time I feed the main starter.)
- If
something goes wrong or doesn’t look quite right, just ask that pesky land
shark (or Mr. Google).
Next week: the art of baking bread (Amateur Rundown).
Sourdough pancakes
The perfect way to make good use of starter that
needs to be “discarded”. I always just eyeball the ingredients for these
pancakes based on the consistency of the starter – so treat the recipe accordingly!
Particularly, the amount of starter here is based on my 75g-routine and the
leftover starter it produces – it could be any quantity. These pancakes can be
made as soon as the sourdough starter is quite active, probably after five or
six days. Until the starter is mature and very bubbly, the pancakes do need
some extra help from another raising agent. Makes about five to seven
American-style pancakes.
150g sourdough starter
1 large egg
about a
tablespoon of sugar, maple syrup or honey
¼ teaspoon of
sodium bicarbonate (or baking powder)
some milk, if
the mixture is very thick
cinnamon and/or
ground ginger
Mix the starter with the sugar, maple syrup or honey, then beat in the
egg. If the mixture is very thick, add a little bit of milk – keep in mind the
mix will end up a lot lighter after the raising agent has done its work. The
mixture should be easy to beat with a fork, but not very runny. Add the sodium
bicarbonate / baking powder and leave for a few minutes. The mixture should
rise, show a lot of bubbles, be very light and run off a ladle slowly. If it
seems too dense still, add some more raising agent. Too runny, add some flour.
Pour about two-thirds of a large ladle of mixture into a well-seasoned or
non-stick frying pan (I never use any extra oil or fat). The mix should spread
out slowly into a circle (about 10-12cm / 4-5 inches in diameter) without
losing all its height. Don’t mess with the cakes until the top is full of holes
and almost dry. Then flip and cook till browned on both sides.
Some blueberries, ricotta and/or vanilla through the mixture are
delicious too.
- Naomi